In today’s digital world, online protection has become more important than ever. Every time you connect to the internet, your data travels across public networks that can easily expose your personal details. This is where VPN tunneling comes into play. Whether you are streaming, working remotely, or simply browsing, understanding VPN tunneling can help you stay private, secure, and anonymous online. Let’s break down what VPN tunneling is, how it works, and what types of tunnels offer the best protection.
What Is VPN Tunneling and Why It Matters
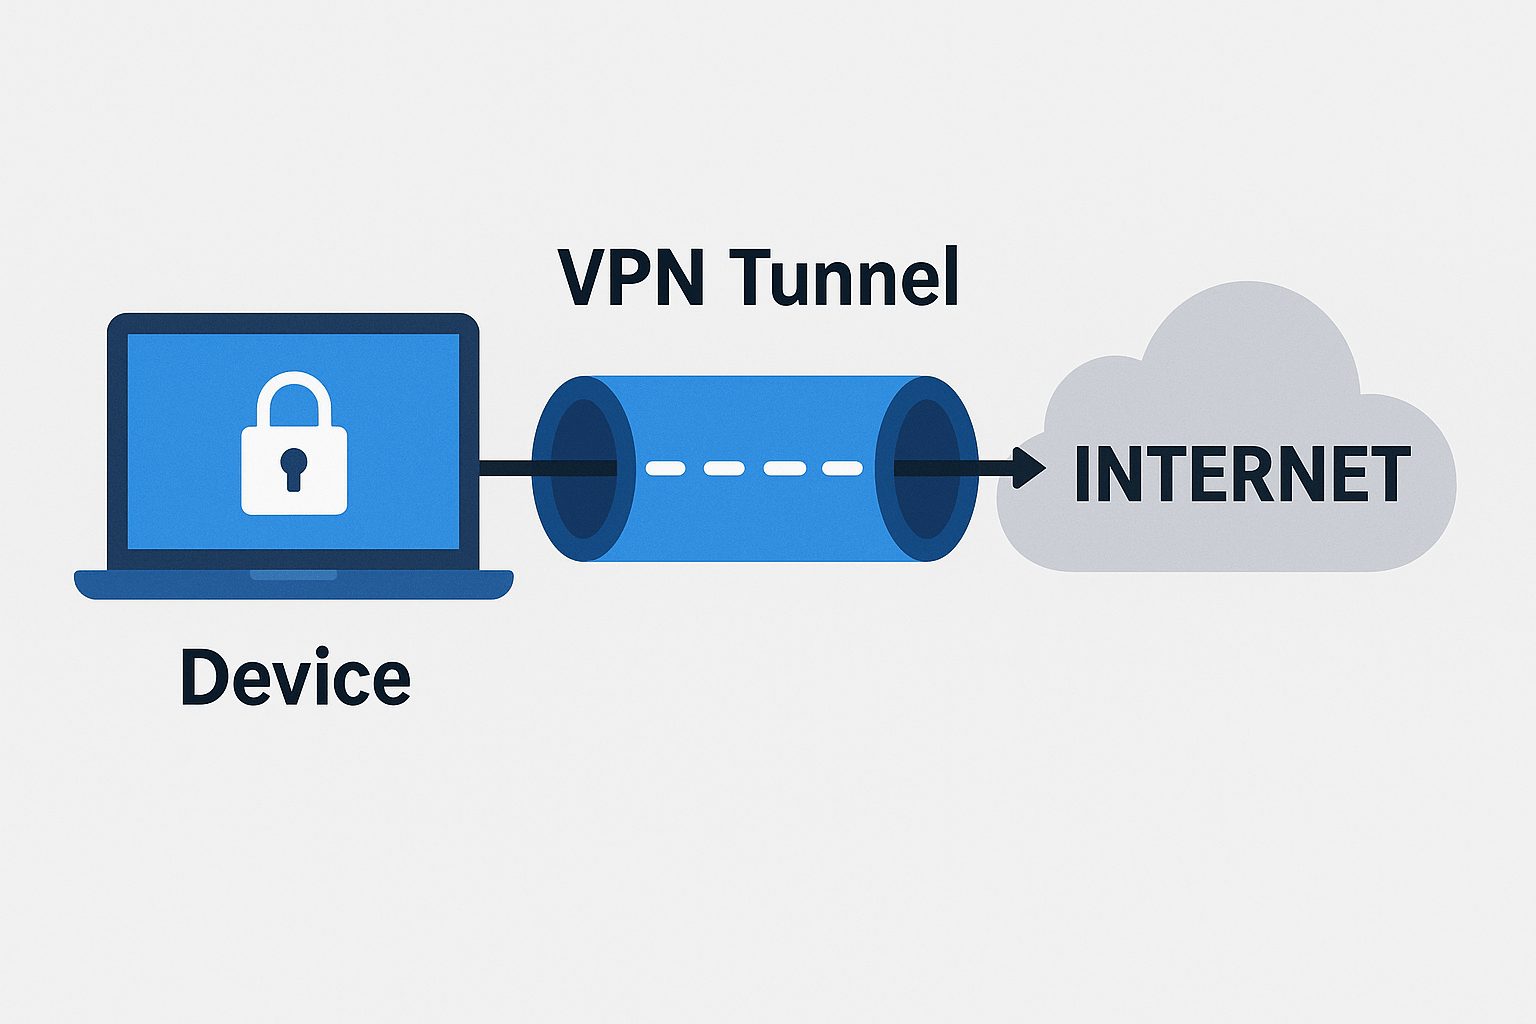
VPN tunneling is a method of creating a secure, encrypted connection between your device and the internet. Imagine your data traveling inside a secret passageway that hides it from prying eyes. This “tunnel” ensures that hackers, internet service providers (ISPs), and cybercriminals cannot access what you do online. Your information moves safely between your device and the VPN server before reaching the website or app you want to use.
The reason VPN tunneling matters is that it creates a layer of security on otherwise risky public networks. When you use Wi-Fi at a coffee shop, airport, or hotel, you are sharing that network with many unknown users. VPN tunneling ensures that even if someone tries to intercept your connection, all they will see is unreadable, encrypted data.
Users also value VPN tunneling for maintaining privacy. Without a VPN, your IP address — your unique online identifier — can be tracked, logged, and linked to your location. A VPN tunnel hides your IP, replacing it with one from the VPN provider’s server. This gives you online anonymity and access to region-restricted sites.
Furthermore, VPN tunneling helps bypass censorship in certain regions. Some countries block popular websites or restrict specific online content. Through a secure tunnel, users can connect to servers in other countries and enjoy unrestricted internet access.
In short, VPN tunneling is not just about hiding your identity; it is about protecting your freedom and data integrity. It helps you browse, stream, and work online without having to worry about who might be watching.
How VPN Tunneling Keeps Your Data Safe Online
The main benefit of VPN tunneling is encryption. Encryption scrambles your data into a coded format that only your VPN server can decode. Even if someone intercepts the traffic, it would appear as gibberish. This makes tunneling particularly useful for handling sensitive information like bank details or passwords.
When you start a VPN connection, your device first authenticates with the VPN server. After verification, the tunnel is established, and an encryption key is generated. This key ensures that all data transmitted between your device and the server remains secure throughout your session.
VPN tunneling also adds protection from data leaks. Without a tunnel, ISPs can track the websites you visit and even sell your browsing history to third parties. The VPN hides these details, making your online behavior invisible to trackers and advertisers.
Additionally, VPN tunneling protects you from man-in-the-middle attacks — a common hacking method where attackers position themselves between you and your destination site. Since all communication is encrypted within the tunnel, the attacker cannot alter or steal data from your session.
This technology also helps secure remote work connections, especially for businesses. Employees accessing company servers from outside networks rely on VPNs to ensure confidential data remains private. VPN tunneling becomes the digital version of a secure office connection, even from home.
In essence, VPN tunneling gives you digital peace of mind. It ensures that your online sessions remain personal and untampered, protecting both your privacy and identity across every connection.
Types of VPN Tunneling Protocols Explained Simply
There are several types of VPN tunneling protocols, each designed for different levels of speed, security, and compatibility. One of the most well-known protocols is OpenVPN. It uses strong encryption and is available on almost all devices. Its balance between speed and safety makes it a top choice for regular users.
Another popular option is IKEv2/IPSec. This protocol is known for maintaining a stable connection, even when switching between Wi-Fi and mobile data. It’s fast, secure, and especially convenient for mobile users.
WireGuard is one of the newest VPN protocols that has gained attention for its simplicity and performance. It uses modern cryptography and runs on a lightweight codebase, making it extremely fast while maintaining high security. Many modern VPN services are now switching to WireGuard for better performance.
L2TP/IPSec, though older, is still used by some VPNs for added compatibility. It wraps data twice for encryption, providing decent security but slightly slower speeds. It’s good for users focusing more on privacy than performance.
There’s also PPTP, the oldest VPN protocol. While it’s fast, it’s now considered insecure for most use cases because of its outdated encryption. It’s mainly found in legacy systems or for low-risk applications.
Understanding the different protocols helps users choose the right VPN tunnel for their needs. Whether you want blazing speed for streaming or airtight security for work, the protocol defines how efficiently your VPN tunnel performs.
Choosing the Right VPN Tunnel for Better Security
Selecting the best VPN tunnel depends on your online activities and devices. If you’re a casual user who primarily browses or streams, a protocol like WireGuard or OpenVPN offers both speed and reliability. These are the go-to choices for most users due to their performance and advanced encryption standards.
For mobile users who frequently move between networks, IKEv2/IPSec is highly recommended. Its ability to reconnect quickly when switching networks keeps sessions stable and uninterrupted — ideal for travelers or business professionals on the go.
If your goal is to ensure top-level encryption for corporate or government-level data, OpenVPN with strong cipher settings is the most trusted option. It provides deep customization for administrators to fine-tune the balance between speed and security.
It’s essential to avoid outdated protocols like PPTP unless you specifically need compatibility with older systems. Modern online threats easily exploit older encryption methods, and relying on them can put your data at risk.
In addition to protocol choice, users should evaluate the VPN provider’s policies. A reliable VPN should have a strict no-logs policy, strong server infrastructure, and updated security measures. These factors are just as important as the tunnel type itself.
Ultimately, the right VPN tunnel is one that fits your lifestyle while keeping privacy intact. Test different VPN configurations, and choose the one that offers seamless performance without compromising your online safety.
VPN tunneling is a cornerstone of modern online privacy. It shields your data, masks your identity, and provides the freedom to explore the web safely. Understanding how it works and choosing the right protocol can dramatically improve your online protection. By using secure VPN tunnels, you’re not just encrypting connections — you’re taking control of your digital life. Stay informed, choose wisely, and enjoy a safer, more private internet experience.
